The time has finally come. We've been renting our new house to the previous owners since September as they had their new house built. They moved out in early December and we're taking this month to do some renovations before our moving day on New Year's eve.
Step one was to paint, but our big goal was to have the carpets ripped out and expose the wood floors before we moved. Since the floor restoration company, Galebach's Floor Finishing, was aiming to start on the 15th we had a small window of time to restore and paint the living room and dining room. And this worked out because carpets make great drop-cloths. To do this we hired my brother, Stephen Sarro, of Sarro Painting (and the band, Unteachers), who did an excellent job!
Here's the two rooms and a close-up of the beautifully detailed radiators BEFORE we bought the home:
Here's the entry-way and living room space as Stephen began working:
This is what renovating looks like. Since the house was built in 1916 and has plaster walls there was much to repair. Restoring the walls and ceilings took about three full days just in these two rooms! We've got an oldie, but a goodie.
We're using Benjamin Moore's Simply White satin finish for the trim and radiators throughout the entire home and that's what you're seeing being applied in the photos. For the ceilings we're using the same, but in a flat finish.
For the dining room we chose Benjamin Moore's Harbor Gray eggshell finish. At certain times of day with with sunlight, it tends to pull more on the blue-gray side. We wanted more of a smoky gray, but it's still a lovely color.
For the living room we chose Benjamin Moore's Windham Cream eggshell finish (the photo below is in low-light, it's a very light, creamy yellow). This is the color I am not sure about yet. I think it is beautiful, but again not the shade we had in mind. We wanted a pale yellow with a little more depth like a golden yellow. At night because of the lighting, the walls look off-white. I'm still trying to get used to it and have thought about trying again. Picking paint colors can be very tricky. I've lost sleep over it!
As soon as we took all of the curtains down and exposed all of the beautiful woodwork, the rooms felt so much bigger. It was shocking! It's still hard to see color in an empty room so we anticipate restored floors and moving day when our home finally begins to come to life.
Things are coming along. Right now Galebach's is just about to apply stain to the wood floors. We've been over to the home about every day since they started and the floors are absolutely gorgeous. Our next post will be about that process. We've taken lots of great photos, but for now here's a taste of things to come ...
Check back often for more of our first home renovation goodness!
Wednesday, December 23, 2009
Tuesday, December 22, 2009
Eggnog Rum Cupcakes
Since the arrival of the Starbucks Eggnog Latte, I've had it in my mind to bake eggnog cupcakes. Last Friday was the perfect day to do it since we had a Christmas party to go to at night. I was beyond excited as I baked away in the kitchen while enjoying some of my favorite Pandora Christmas music. It was a lot of fun!
It doesn't matter how you put eggnog and rum together because no matter how, you know it's gonna be insane. Eggnog is my absolute favorite treat of the Holidays, especially Horizon's organic. I also love rum cake and didn't know it could get any better.
Using eggnog in the cake batter makes these cupcakes extra fluffy and ultra moist. I can not describe the amount of goodness that you will experience.
They are so amazing you won't really believe it. It's like a dream.
You must try these soon. They will easily become your favorite too, I'm positive.
Eggnog Cupcakes
by Me
Makes 18-20 cupcakes
Ingredients:
1 package yellow cake mix w/ pudding
4 eggs
1/2 cup eggnog
1/2 cup cooking oil
1/2 cup spiced rum
1/4 tsp ground nutmeg
Preheat oven to 350 and line a cupcake tray with paper liners.
Place cake mix, nutmeg, oil, eggs, eggnog and rum in a mixing bowl. Blend with mixer on low speed for 1 minute. Stop machine, scrape down sides of bowl.
Increase mixer speed to medium and beat 2 minutes more. Scrape down sides again if needed. The batter should look well combined and thickened. Divide the batter into prepared muffin tray. Fill each cup about 3/4 of the way full.
Bake until light brown and springs back when lightly pressed with your finger, or until a toothpick comes out clean. About 20-25 minutes.
Remove pan from oven and place on wire rack to cool for 20 minutes. Remove cupcakes from tray and cool completely, 30 minutes.
Eggnog Buttercream
1/2 cup (1stick) butter, softened
1/4 cup eggnog
1 tsp. vanilla
3-4 cups confectioners’ sugar
Fresh nutmeg for sprinkling on top
Blend together the cream cheese and butter using an electric mixer on low speed until combined, about 30 seconds.
Alternate the eggnog and the powdered sugar, adding a little bit at a time, blending on low speed until well incorporated, about 1 minute.
Add the vanilla, then increase the mixer speed to medium and blend frosting until fluffy, 1 minute more. (You may need to add more sugar if you will be piping the frosting).
Garnish with grated fresh nutmeg on top.
Saturday, November 14, 2009
Philly Cream Cheese Pound Cake
Wow, so it's no surprise I am the worst blogger ever! I'm not even going to make any excuses this time. Enough said.
I came across a classic recipe for "Philly Pound Cake" from a really awesome blog. Thanks for sharing, sophistimom!
This was the best pound cake I have eaten. Ever.
But I can't promise it will taste the same with just any cream cheese. So don't take any chances and please use Philadelphia. It is the best. You won't regret it!
I made two regular-sized loaves because I didn't have the mini pans.
The mini's would make lovely gifts all wrapped up or with a simple ribbon. I really like using Martha's food packaging line from Michaels. It's a lot of fun.
Enjoy!
Philly Pound Cake
Adapted from Philadelphia Inquirer
Ingredients:
2 sticks unsalted butter, softened, but not quite room temperature
8 ounce package of cream cheese, softened slightly
1 1/2 cups sugar
4 eggs
1 1/2 teaspoons pure vanilla extract
2 cups unbleached all-purpose flour
1 1/2 teaspoons baking powder
1 1/2 teaspoons kosher salt
confectioners’ sugar for dusting
1. Preheat oven to 325 degrees. Spray four mini loaf pans with non-stick cooking spray, and place on a cookie sheet.
2. In a mixer fitted with the paddle attachment, cream together butter and cream cheese. Pour in sugar and mix until smooth. Add in eggs, one at a time, mixing well until each is incorporated.
3. While ingredients are mixing, whisk together four, baking powder, and salt in a separate bowl. Slowly add flour mixture to the wet ingredients.
4. Distribute batter evenly among the four pans and bake until a toothpick inserted in the center comes out clean, about 50-60 minutes. Let cool and dust with confectioners’ sugar. Wrap any extras tightly in plastic wrap and freeze for up to one month.
Labels:
baking,
cake,
cream cheese,
martha,
packaging,
philly,
pound cake
Friday, October 9, 2009
Baked Gruyere and Sausage Omelet
Ahhh, sometimes there's just nothing better than good ol' breakfast for dinner. We try to do this every month or so and I really look forward to these nights.
This recipe is extremely versatile and can be made using bacon, ham or any variety of cheese. I just looove gruyere with eggs. Especially the cheesy crust on top. It is the best!
Baked Gruyere and Sausage Omelet
Adapted from Giada
Ingredients:
Butter, for greasing baking dish
2 tablespoons olive oil
1 small onion, diced
1/2 pound mild turkey sausage, casings removed
8 large eggs
1/3 cup whole milk
1 teaspoon kosher salt
Freshly ground black pepper
1 red bell pepper, diced
1 1/2 cups (4 ounces) grated Gruyere cheese
1/4 cup plus 2 tablespoons chopped fresh flat-leaf parsley (I used scallions)
Directions:
Preheat the oven to 425 degrees F. Lightly butter an 8 by 8-inch baking dish.
Heat the oil in a medium skillet over medium-high heat. Add the onion and cook until translucent, about 3 minutes. Add the sausage and cook until brown, about 5 minutes. Set the pan aside to cool.
In a large bowl, whisk together the eggs, milk, salt and pepper, to taste, until smooth, about 20 seconds. Add the red bell pepper, 1 cup of Gruyere cheese and 1/4 cup of parsley. Stir in the onion mixture. Pour the batter into the prepared pan. Sprinkle with the remaining cheese. Bake for 20 to 25 minutes or until golden brown.
Cut the baked omelet into wedges and sprinkle with remaining parsley (or scallions like I did!) before serving.
Cook's Note: To make individual servings, divide the batter between 4 buttered 8-ounce ramekins. Bake for 15 to 18 minutes.
Thursday, September 10, 2009
I'm back!!!
Is anyone still here? Well, I'm back AGAIN and apologize for disappearing on you!
I know I promised I would post more often, but what can I say?
Well, I've been a little preoccupied lately with fun stuff like buying a new house and day dreaming about all the lovely things I can't wait to do with it!
So, I was thinking I may start including "house stuff" on here instead of just the usual food. We bought a historic English Tudor that has tons of character so we have many, many plans to update and restore a lot of it's natural beauty. This will also be a great way for all of our long distance family and friends to stay up to date. It will be a few months until you see any house action on here since we have yet to move, so please come back!
In the meantime, I am beyond excited for fall and and can not hold off the pumpkin and comfort foods any longer! It is our absolute favorite time of year and this one is especially going to be great. Justin and I will be celebrating five years of marriage and moving into our first home, Hooray!
Saturday, June 27, 2009
Coconut Layer Cake
This was my first attempt at making a coconut cake and I was really quite pleased with the outcome. I actually made this cake way back in March for my brother's birthday and I'm just now sharing with you. I know, pathetic.
I used two different recipes; one for the cake and one for the frosting. The cake is like a pound cake consistency and so I wanted to pair it with a cream cheese buttercream rather than the traditional meringue style. Both were incredible and I'll definitely be making again before the summer ends.
I didn't have my camera with me and I wanted to show what the inside looks like.
Coconut Layer Cake
Adapted from Cooks Illustrated
Makes one 9-inch, 4-layer cake.
Ingredients:
1 large egg
5 large egg whites
3/4 cup cream of coconut
1/4 cup water
1 teaspoon vanilla extract
1 teaspoon coconut extract
2 1/4 cups cake flour (9 ounces), sifted
1 cup granulated sugar
1 tablespoon baking powder
3/4 teaspoon table salt
12 tablespoons unsalted butter (1 1/2 sticks), cut into 12 pieces, softened, but still cool
2 cups packed sweetened shredded coconut (about 8 ounces)
1. For the Cake: Adjust oven rack to lower-middle position and heat oven to 325 degrees. Grease two 9-inch round cake pans with shortening and dust with flour.
2. Beat egg whites and whole egg in large measuring cup with fork to combine. Add cream of coconut, water, vanilla, and coconut extract and beat with fork until thoroughly combined.
3. Combine flour, sugar, baking powder, and salt in bowl of standing mixer fitted with paddle attachment. Mix on lowest speed to combine, about 30 seconds. With mixer still running on lowest speed, add butter 1 piece at a time, then beat until mixture resembles coarse meal, with butter bits no larger than small peas, 2 to 2 1/2 minutes.
4. With mixer still running, add 1 cup liquid. Increase speed to medium-high and beat until light and fluffy, about 45 seconds. With mixer still running, add remaining 1 cup liquid in steady stream (this should take about 15 seconds). Stop mixer and scrape down bowl with rubber spatula, then beat at medium-high speed to combine, about 15 seconds. (Batter will be thick.)
5. Divide batter between cake pans and level with offset or rubber spatula. Bake until deep golden brown, cakes pull away from sides of pans, and toothpick inserted into center of cakes comes out clean, about 30 minutes (rotate cakes after about 20 minutes). Do not turn off oven.
6. Cool in pans on wire racks about 10 minutes, then loosen cakes from sides of pans with paring knife, invert cakes onto racks and then re-invert; cool to room temperature.
7. While cakes are cooling, spread shredded coconut on rimmed baking sheet; toast in oven until shreds are a mix of golden brown and white, about 15 to 20 minutes, stirring 2 or 3 times. Cool to room temperature.
Buttercream
Adapted from somewhere
Ingredients:
12 ounces of cream cheese slightly chilled
1 stick of butter plus 6 tablespoons of butter (7 ounces) unsalted butter at room temperature
1 cup of confectioners sugar, sifted after measuring
2 teaspoons of granulated sugar
¼ cup of water
3 egg whites
1 teaspoon of coconut extract
1. Place the cream cheese in the bowl of a mixer and beat on medium speed until slightly fluffy and smooth. Add the butter 1-2 tablespoons at a time, mixing until smooth. Add the confectioner’s sugar and coconut extract and mix until fluffy. Set aside at room temperature while buttercream is made.
2. Combine the granulated sugar and water in a small heavy saucepan and bring to a boil over medium heat, stirring to dissolve sugar. Continue to cook without stirring until the syrup reaches the softball stage 228 degrees F on a candy thermometer.
3. Meanwhile, place the egg whites in mixer bowl and have the mixer ready to go. When the syrup is ready, turn the mixer on med-low and begin mixing the egg whites. Slowly add the hot syrup to the whites taking care not to pour onto the beaters, it may splash. When all the syrup is incorporated, raise the speed on the mixer to med-high and beat the egg whites until mixture has cooled and stiff meringue forms.
4. With the mixer on low, begin adding the cream cheese mixture by the spoonful. When all is incorporated, raise the speed to medium and whip until frosting is smooth and fluffy.
5. Spread a generous amount of frosting between each layer. Sprinkle the sides with toasted coconut. Enjoy.
Thursday, May 28, 2009
Springtime Lemon Cupcakes
Last year I found these adorable flower cupcake liners that I intended to use for Springtime lemon cupcakes. I also found these really cute jumbo sprinkles at Walmart that I thought would match PERFECT. Love love the pastels!
I must say, these lemon cupcakes were exceedingly moist on the inside. And I love the yellow color!
And finally, here on display at my mom's house using her lovely cupcake stand. So cute!
Elaine's Lemon Supreme Cake
Adapted from The Cake Mix Doctor cookbook
Ingredients:
Vegetable oil spray for misting the pan
Flour for dusting the pan
1 package (18.25 ounces) lemon cake mix
1 package (3 ounces) lemon gelatin (I used lemon pudding mix)
3/4 cup vegetable oil, such as canola, corn, safflower, soybean, or sunflower
3/4 cup water
4 large eggs
Directions:
1. Preheat oven to 350. Generously grease and flour a 13- by 9-inch baking pan or line a cupcake tray with paper liners
2. Place cake mix, gelatin or pudding, oil, water, and eggs in mixing bowl. Blend with mixer on low speed for 1 minute. Stop machine, scrape down sides of bowl.
3. Increase mixer speed to medium and beat 2 minutes more. Scrape down sides again if needed. The batter should look well combined and thickened.Pour the batter into the prepared pan.
4. Bake the cake until it is light brown and springs back when lightly pressed with your finger, 35-40 minutes. OR for cupcakes 20-25 minutes.
5. Remove pans from oven and place on wire rack to cool for 20 minutes.
Run a dinner knife around edge of cake and invert it onto wire rack. Allow cake to cool completely, 30 minutes.
Cream Cheese Frosting
Ingredients:
8 ounces cream cheese, at room temp.
1 stick of butter, softened
3 3/4 cups powdered sugar, sifted
1 teaspoon vanilla
Directions:
1. Blend together the cream cheese and butter using an electric mixer on low speed until combined, about 30 seconds.
2. Add the powdered sugar, a bit at a time, blending on low speed until well incorporated, about 1 minute.
3. Add the vanilla, then increase the mixer speed to medium and blend frosting until fluffy, 1 minute more. (You may need to add more sugar if you will be piping the frosting).
Monday, May 25, 2009
CamelBak Water Bottle
I am madly in love with this water bottle and it's PINK! It is completely leak- proof, BPA free and I love the blue bite valve. My hubby has one too, but in black so he thinks his is way cooler.
Thursday, May 7, 2009
Slow Cooker Pulled Pork
Wow. I can't even believe I haven't shared this recipe yet! It's so good I've made it twice so far in the last few months. I showed up with a crock pot full to one of our many family gatherings. We have a pretty large family and this always seems to go pretty far.
There are a lot of recipes for crock pot pulled pork, but I really liked this version from The Way The Cookie Crumbles. She used a spice rub recipe from Cooks Illustrated, so you pretty much can't go wrong with that. Another recipe I'd like to try soon is made with root beer. yum!
If you are using a smaller pork roast, which I did the first time, then I would recommend decreasing the amount of the spice mixture or it will be way to spicy. Also, I think there is too much pepper in the spice rub and will use less next time. Or use less chili powder. Either way, you can sort of play around with it until it is to your preference of spice level. I did not marinate the pork for 3 hours. I skipped this step all together and there was LOTS of flavor.
Slow Cooker Pulled Pork
Adapted from Cooks Illustrated
Spicy Chili Rub:
1 tablespoon ground black pepper
1-2 teaspoons cayenne pepper
2 tablespoons chili powder
2 tablespoons ground cumin
2 tablespoons dark brown sugar
1 tablespoon dried oregano
4 tablespoons paprika
2 tablespoons table salt
1 tablespoon granulated sugar
1 tablespoon ground white pepper
1 (6-8 pound) bone-in pork roast (preferably shoulder or Boston butt)
½ teaspoon liquid smoke (optional)
2 cups of your favorite barbecue sauce
Directions:
1. Mix all spice rub ingredients in small bowl.
2. Massage spice rub all over meat. Wrap tightly in double layer of plastic wrap; refrigerate for at least 3 hours or overnight.
3. Unwrap roast and place it in a slow cooker. Add liquid smoke, if using, and ¼ cup water. Cook on low for 8-10 hours, until meat is fork-tender.
4. Transfer roast to cutting board and discard liquid. Shred the pork with two forks or your fingers. Discard fat.
5. Place the shredded meat back into the slow cooker; toss with 1 cup barbecue sauce, adding more to taste. Heat on low for 30-60 minutes or until ready to serve. Serve with additional barbecue sauce.
Sunday, May 3, 2009
Restaurant-Style Hummus
I've always loved hummus, but this was actually my first time making it. It was so much easier than I thought, although at first I had a really hard time finding Joyva tahini. Tahini is a paste made of ground sesame seeds and it gives hummus an authentic flavor. It is a must for home-made hummus. I eventually found it at a local health food store and then I started seeing it everywhere after that. Of course...that is what typically happens to me.
This was a very basic hummus, but in my opinion much better than the store bought brands I've tried. It was very creamy and had tons of flavor. Basically, you just throw all of the ingredients together into the food processor and...DONE!
Restaurant-Style Hummus
Cook's Illustrated
Ingredients:
3 tablespoons juice from 1 to 2 lemons
1/4 cup water
6 tablespoons tahini , stirred well (see note)
2 tablespoons extra-virgin olive oil , plus extra for drizzling
1 (14-ounce) can chickpeas , drained and rinsed (see note)
1 small garlic clove , minced or pressed through garlic press (about 1/2 teaspoon)
1/2 teaspoon table salt
1/4 teaspoon ground cumin
Pinch cayenne
1 tablespoon minced fresh cilantro or parsley leaves
Instructions:
1. Combine lemon juice and water in small bowl or measuring cup. Whisk together tahini and 2 tablespoons oil in second small bowl or measuring cup. Set aside 2 tablespoons chickpeas for garnish.
2. Process remaining chickpeas, garlic, salt, cumin, and cayenne in food processor until almost fully ground, about 15 seconds. Scrape down bowl with rubber spatula. With machine running, add lemon juice-water mixture in steady stream through feed tube. Scrape down bowl and continue to process for 1 minute. With machine running, add oil-tahini mixture in steady stream through feed tube; continue to process until hummus is smooth and creamy, about 15 seconds, scraping down bowl as needed.
3. Transfer hummus to serving bowl, sprinkle reserved chickpeas and cilantro over surface, cover with plastic wrap, and let stand until flavors meld, at least 30 minutes. Drizzle with olive oil and serve.
Tuesday, April 28, 2009
Bad blogger
Okay everyone...I know, I know. It's been a month since my last post! I apologize to those of you who are such faithful readers. Thank you, by the way- I'll try to be better.
I'm not exactly sure why I haven't felt like blogging lately. Maybe it's just pure laziness since there's a ton of new recipes that need to be added. They sort of creep on me and then I don't know where to begin, Ugh!! Anyway...
It's been a little over a year now since I started this blog and have come to the realization that some things need changed. Right now I'm in the process of going back through all of the posts from the very beginning and making some slight changes. It's nothing major, just the little quirky things that I don't really like. So, I wanted to let everyone know. Oh, another thing...I'm also on twitter now. Still trying to get used to it and not sure if I really need it, but it's fun.
Well, please send me a comment or message sometime just to say hi. It always make this blog much more enjoyable:) Hope you have a great week and are enjoying this lovely Spring (or Summer shall I say?) weather!
Sunday, March 29, 2009
Anthropologie Lovlies
I'll take all of these to freshen up for Spring, please!
1. Pontic Azalea Top
2. Sweet & Lucky Potholders
3. The Artist's Tote
4. Eggshell Bowls
5. Lovin' Spoonful Measuring Set
6. Crocus Bud Peep-Toes
7. Pixelated Paradise Dessert Plates
8. Stockholm Floral Apron
1. Pontic Azalea Top
2. Sweet & Lucky Potholders
3. The Artist's Tote
4. Eggshell Bowls
5. Lovin' Spoonful Measuring Set
6. Crocus Bud Peep-Toes
7. Pixelated Paradise Dessert Plates
8. Stockholm Floral Apron
Saturday, March 28, 2009
Girl Scout Samoa Bars
Who doesn't LOVE Girl Scout cookies? Most people usually have their favorite and I remember the Samoas or Caramel deLites always used to be my favorite growing up. You know- the chewy, caramel chocolate-y ones. I could eat the whole box myself!
I came across this recipe- a bar version of the cookie on Baking Bites, but now I'm kind of sorry that I ever did. They are sooo good that I will just be tempted to make them all year long. And let me tell you- they are extremely good dipped into hot coffee. You won't need to buy another $4.00 box ever again(at least of the Samoas).
Tuesday, March 17, 2009
Nutella Hot Chocolate
I must say my love for Nutella is like none other and I must admit... sometimes I eat it straight from the jar. Who can resist?
Nutella is so good that it even has it's own holiday. It is the best stuff on earth, I'm pretty sure.
Nutella Hot Chocolate
1 cup milk
1-3 tablespoons Nutella, depending on how sweet you like (I only used 1)
1 teaspoon of instant espresso powder
In a small saucepan over medium heat, combine all 3 ingredients and whisk until smooth and frothy. Pour into your favorite mug and if desired top with cocoa powder, cinnamon, or mini marshmallows. Enjoy.
Ribollita
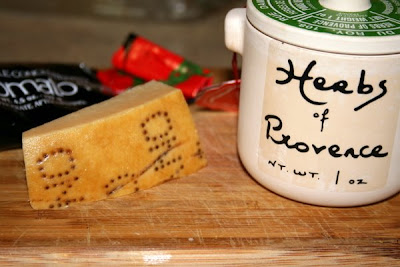
Ribollita is a simple yet hearty Tuscan bean soup that I absolutely love. I really like to make a big pot of soup when I sort of want to clean up the pantry. It always seems to get really full especially in the winter time so it was necesarry. I also had a Parmesan cheese rind in the fridge that needed to be used up, which is amazing in soups.
Whenever I get down to the end of the rind, I just wrap it in some plastic wrap and stick it in the freezer for when I want to make soup. That is just one tip that I learned from watching Giada. Pretty nifty, right?
Speaking of Giada, this is one of her recipes and it can be found here. Enjoy.
Tuesday, March 3, 2009
Guinness Chocolate Cake
I hate to post two chocolate birthday cakes in a row! Actually I guess this post couldn't come at a more perfect time since St. Patty's Day is right around the corner.
When I first spotted all of the recipes for Guinness cake floating around the internet, I could not wait to make one! Not that I love beer or anything- in fact I pretty much hate the taste of it. But I just knew that it would make the perfect birthday cake for my brother who loves anything with Guinness in it.
There are a lot of different variations out there for Guinness cake and I could not decide which recipe to use. I knew I wanted a double layer cake so I sort of came up with my own version. I used the most fabulous chocolate cake recipe from my last post and made a few slight changes. You can view the recipe below.
Just a few of my thoughts:
The flavor of the cake doesn't really have a strong beer flavor like you would think...but the Guinness really brings out the chocolate, sort of like coffee does. They compliment each other so well and becomes this amazing flavor that I can't quite describe. Not too sweet or chocolate-y, but just right. It's really, really unbelievably good!
Another heads up, this is a VERY moist cake. I had some issues getting the cake out of the pan and so that is why you can see little bits of cake coming through the frosting. I wasn't even going to show the picture because I thought it looked so bad, but what fun would that be! Anyway, be sure to line the bottom of the cake pans with parchment paper and you should be fine. I learned the hard way!
I think next time I will try making it into little cupcakes, maybe for St. Patty's Day with little shamrocks on top. Well, that might have to be for next year since we're all caked out.
Guinness Chocolate Cake
Ingredients:
Butter, for greasing the pans
1 3/4 cups all-purpose flour, plus more for pans
2 cups sugar
3/4 cups good cocoa powder
2 teaspoons baking soda
1 teaspoon baking powder
1 teaspoon kosher salt
1 cup buttermilk, shaken
1/2 cup vegetable oil
2 extra-large eggs, at room temperature
1 teaspoon pure vanilla extract
1 cup Guinness stout beer, room temperature
Directions:
Preheat the oven to 350 degrees F.
Butter 2 (8-inch) round cake pans. Line with parchment paper, then butter and flour the pans.
Sift the flour, sugar, cocoa, baking soda, baking powder, and salt into the bowl of an electric mixer fitted with a paddle attachment and mix on low speed until combined.
In another bowl, combine the buttermilk, oil, eggs, and vanilla.
With the mixer on low speed, slowly add the wet ingredients to the dry.
With mixer still on low, add the beer and stir just to combine, scraping the bottom of the bowl with a rubber spatula.
Pour the batter into the prepared pans and bake for 35 to 40 minutes, until a cake tester comes out clean.
Cool in the pans for 30 minutes, then turn them out onto a cooling rack and cool completely.
Place 1 layer, flat side up, on a flat plate or cake pedestal.
With a knife or offset spatula, spread the top with frosting.
Place the second layer on top, rounded side up, and spread the frosting evenly on the top and sides of the cake.
Chocolate Frosting
Ingredients:
6 ounces good semisweet chocolate
1/2 pound (2 sticks) unsalted butter, at room temperature
1 extra-large egg yolk, at room temperature
1 teaspoon pure vanilla extract
1 1/4 cups sifted confectioners' sugar
1/2 teaspoon instant coffee or espresso powder
1-2 tablespoons of Guinness stout beer
Directions:
Chop the chocolate and place it in a heat-proof bowl set over a pan of simmering water. Stir until just melted and add the coffee powder then set aside until cooled to room temperature.
In the bowl of an electric mixer fitted with a paddle attachment, beat the butter on medium-high speed until light yellow and fluffy, about 3 minutes.
Add the egg yolk and vanilla and continue beating for 3 minutes.
Turn the mixer to low, gradually add the confectioners' sugar, then beat at medium speed, scraping down the bowl as necessary, until smooth and creamy.
On low speed, add the chocolate and beer to the butter mixture and mix until blended. Don't whip!
Spread immediately onto the cooled cake.
Friday, February 27, 2009
The Best Chocolate Cake
January and February are by far the two craziest birthday months in our family. I did 5 out of 7 cakes in just 2 months! Everyone is still managing to stick to their diets though, so I don't feel that guilty!
I've been saving Barefoot Contessa's Beatty's Chocolate Cake recipe for months so when my dad asked for chocolate cake- I had a plan. I think I'm safe to say that I will never need another chocolate cake recipe ever AGAIN. It was amazing!! I could go on and on about this cake because it seriously was the best I think I ever had. The Contessa does it again!
I used Scharffen Berger cocoa powder and semi-sweet chocolate which is a bit pricey, but very high quality and totally worth it for this recipe.
Sorry for the sloppy picture. I almost forgot to take one.
Here are my slight changes to the recipe:
Cake: I used a 1/2 cup of coffee and added a 1/2 cup of water to it.
Frosting: I used 1/2 tsp. of instant espresso powder instead of 1 tablespoon.
You can add as little or as much as you like, but since my dad hates coffee I was afraid to add the whole thing. I plan on making it again with the entire amount because being the coffee lover that I am, you can never have too much!
Sunday, February 15, 2009
Valentine's Day Cupcakes
For Valentine's Day I whipped up these cute cupcakes in no time at all- thanks to my Cake Mix Doctor cookbook. Once in a while when I need a really quick recipe I'll use this book and nobody can ever tell that it came from a box mix..which is most important, right?
Basic Sour Cream White Cake
Adapted from The Cake Mix Doctor cookbook
Ingredients:
1 (18 1/4 ounce) package plain white cake mix
1 cup sour cream
1/2 cup vegetable oil
3 large eggs
1 teaspoon vanilla extract
Directions:
1. Preheat oven to 350.
2. Generously grease and flour a 13 x 9 inch baking pan or line a cupcake tray with paper liners
3. Place cake mix, sour cream, oil, eggs, and vanilla in mixing bowl.
4. Blend with mixer on low speed for 1 minute
5. Stop machine, scrape down sides of bowl.
6. Increase mixer speed to medium and beat 2 minutes more.
7. Scrape down sides again if needed. The batter should look well combined and thickened.
8. Pour the batter into the prepared pan.
9. Place pan in oven.
10. Bake the cake until it is light brown and springs back when lightly pressed with your finger, 35-40 minutes. OR for cupcakes 20-25 minutes.
11. Remove pan from oven and place on wire rack to cool for 20 minutes.
12. Run a dinner knife around edge of cake and invert it onto wire rack.
13. Allow cake to cool completely, 30 minutes.
14. Prepare the frosting
Strawberry Cream Cheese Frosting
Ingredients:
8 ounces cream cheese, at room temp.
1 stick of butter, softened
3 1/2 cups powdered sugar, sifted
3/4 cup fresh ripe strawberries, rinsed, capped, and mashed to make 1/2 cup, then drained well
Directions:
1. Blend together the cream cheese and butter using an electric mixer on low speed until combined, about 30 seconds.
2. Add 3 cups powdered sugar, gradually, and the mashed strawberries; blend frosting again on low speed until the sugar is incorporated, 1 minute.
3. Increase mixer speed to medium and blend frosting until fluffy, 30-45 seconds more, adding up to 1/2 cup more sugar to make desired spreading consistency. (You may need to add more than that if you will be piping the frosting).
4. Use as desired.
Tuesday, February 3, 2009
Mini Orange Chocolate Chunk Cake
This is the first time I baked the same thing twice in the same week! It was that good! First, because I recently came to discover that my little brother loves chocolate and orange as much as I do so I wanted to make it for him. And second, because my mom liked it so much she wanted it for her Birthday.
If you recall, I made the bundt version of this cake awhile back, but something about these little minis was soooo much better! The recipe can be found here.
I used a Martha Stewart mini bundt pan, made by Nordic Ware that was only $8 on clearance at Kmart. These baby cakes slid right out of the pan-it was incredible! I must buy more Nordic Ware soon!
I took a lot of pictures this time because I couldn't resist. They are just so darn cute!
Sunday, January 25, 2009
Crock Pot 16 Bean Soup
I love my crock pot especially for soups and stews. This soup is also called holiday bean soup and I've been making it ever since my first year of marriage. It started after a visit to PA when my mom handed me a bag of 16 bean mix and a leftover holiday ham shank to take back home. I didn't really know what I was doing, but the soup is now one of Justin's most requested so I must of done something right!
Crock Pot 16 Bean Soup
Ingredients:
1 package 16 Bean Soup (about 2 cups)
2 bay leaves
1 tsp. chili powder
2 stalks celery chopped
2 carrots diced
1 large onion chopped
2-3 cloves garlic chopped
1 ham hock or shank
1 28 oz. can tomatoes stewed or diced
6 cups water
salt and pepper to taste
Directions:
1. Place the beans in a large pot or bowl and cover with water until above the bean line. Soak overnight. Drain in the morning.
2. In a crock pot, place all of the ingredients and cook on low for 6-8 hours.
3. Remove the ham and shred or chop the meat and add back into the pot. Continue cooking until ready to serve.
Monday, January 19, 2009
Chocolate Mascarpone Brownies
I crave brownies ALL the time so I'm always looking for that perfect chewy brownie recipe that will turn out just like the boxed mix. I came across this recipe and thought how perfect since I already had a tub of mascarpone that needed to be used up. So far every other recipe I've tried has failed me until now. Well, sort of...
These brownies win for taste, but are still lacking the right consistency- in my opinion. High quality chocolate is suggested for this recipe and makes all the difference in taste. I used Valrhona cocoa powder that I bought online from Chocosphere.
If you are craving something really rich and indulgent, these are for you. In the meantime my hunt will continue for the ultimate chewy and fudgy brownie. Anyone want to share their favorite recipe?
Sunday, January 11, 2009
New year, New mixer
I am so excited I can barely stand it! I received the best Christmas gift this year a girl could ever ask for. Here she is... my beautiful, ruby red KitchenAid Mixer. It's a total dream come true!
My husband is the absolute best and totally shocked me on Christmas morning. I could not believe he pulled it off. I seriously find out about EVERYTHING. I had no idea what was in the box under the tree for 2 whole weeks and the thought did not even enter my mind. So needless to say, I was very surprised and it was great!
Now I have some serious baking to do this year!
**Update 1/19/2009**
So, I have decided to go with a different color- crazy huh? I have always had an issue when it comes to picking a color for my wish list, so this should not come as a surprise. I battled with this decision for over 2 weeks, but have finally settled. This Ice blue color is gorgeous and on it's way!
Subscribe to:
Posts (Atom)