Monday, December 22, 2008

Sugar Cookies


If you're like me and don't have the patience for roll-out sugar cookies, you must try this recipe. These turned out so soft and amazing, not hard like most I've had. The frosting was really good as well. I didn't change a thing about both of these recipes and they were just perfect.


A little messy though. I had food coloring all over the place!

Saturday, December 20, 2008

Pecan Bars


Here's another Cooks Illustrated recipe that I adore for classic pecan bars. It's super easy just like making pecan pie.

Pecan Bars
Cooks Illustrated

Makes 24.

Toast all of the pecans for the recipe (2 ¼ cups) on a rimmed baking sheet in a 350-degree oven until fragrant (about 8 minutes), stirring once. Assemble the pecan filling while the crust bakes. Once the crust is lightly browned, spread the filling on top and continue baking. Because of their high sugar content, pecan bars store well and taste great up to 5 days after baking. While we liked bourbon the best, dark rum is quite good. For a very boozy tasting bar cookie, add another tablespoon of liquor.

Crust
1 cup unbleached all-purpose flour (5 ounces)
1/3 cup packed light brown sugar (2 1/3 ounces)
1/4 cup toasted pecans , chopped coarse, toasted
1 teaspoon table salt
1/4 teaspoon baking powder
6 tablespoons cold unsalted butter (3/4 stick), cut into 1/2-inch pieces

Pecan Filling
1/2 cup packed light brown sugar (3 1/2 ounces)
1/3 cup light corn syrup
4 tablespoons unsalted butter (1/2 stick), melted
1 tablespoon bourbon + 1 tsp or dark rum (for a little more booze, add 2 tbs total)
2 teaspoons vanilla extract
1/2 teaspoon table salt
1 large egg , lightly beaten
2 cups toasted pecans , chopped coarse, toasted

1. For the crust: Adjust oven rack to middle position and heat oven to 350 degrees. Spray 8-inch square baking pan with nonstick cooking spray. Fold two 16-inch pieces of foil or parchment paper lengthwise to measure 8 inches wide. Fit 1 sheet in bottom of greased pan, pushing it into corners and up sides of pan (overhang will help in removal of baked bars). Fit second sheet in pan in same manner, perpendicular to first sheet. Spray sheets with nonstick cooking spray.

2. Place flour, brown sugar, pecans, salt, and baking powder in food processor. Process mixture until it resembles coarse cornmeal, about five 1-second pulses. Add butter and pulse until mixture resembles sand, about eight 1-second pulses. Pat mixture evenly into prepared pan and bake until crust is light brown and springs back when touched, about 20 minutes.

3. For the pecan filling: While crust bakes, whisk together brown sugar, melted butter, corn syrup, bourbon, vanilla, and salt in medium bowl until just combined. Add egg and whisk until incorporated.

4. Pour filling on top of hot crust and sprinkle pecans evenly over top. Bake until top is brown and cracks start to form across surface, 22 to 25 minutes. Cool on wire rack for 1 hour. Remove bars from pan using foil or parchment handles and transfer to cutting board. Cut into bars that measure 1 1/2 inches by 2 1/4 inches.

Friday, December 19, 2008

Best Ever Snickerdoodles


It's been so long since I've posted anything. Where does the time go?
I thought I'd take a quick second out of this insanely busy day to post my FAVORITE Snickerdoodle recipe before Christmas is all said and done.


I made these cookies last month and again the other day. You have got to try them. They are super easy and fast!

Sunday, November 23, 2008

Apple Pie Cupcakes

As promised, here are the apple pie cupcakes. As soon as I saw these cupcakes at alpineberry a year ago, I could not wait to try them. They are without a doubt delicious!!


Thursday, November 13, 2008

Pumpkin Cupcakes

Every October we host an Autumn pumpkin fest to celebrate our favorite season and all things pumpkin. I am totally crazy about pumpkins if you haven't noticed by now so it's a lot of fun!!
We serve lots of food, pumpkin beer, hot cider and just hang outside by a cozy fire. Here are a couple pumpkin ideas from this year's party. Inspired by the M. Stewart.


I also made these pumpkin cupcakes along with the chili from last post, apple pie cupcakes, and some amazing whoopie pies which I'll post next, I promise.


Not quite the orange I was going for and you can barely see the cute yellow stripes on the liners, oh well.


Wednesday, November 12, 2008

Pumpkin Chili


For the past four year, I've been making this chili for our annual Fall Fest held every October. Just about everyone is afraid to try it when I tell them it's "pumpkin chili", but I'm telling ya, it's sooo good!

This is basically a simple beef chili with a little bit of added pumpkin puree and cinnamon for just a hint of sweetness. And the pumpkin turns it such a pretty, orange-y fall color. You can hardly taste the pumpkin and probably wouldn't even know it was in there. It's the kind of taste that makes you go hmm? But seriously, do not be afraid and please try this recipe!

Pumpkin Chili
Serves 10 or more

Ingredients:
2 tablespoons vegetable oil
2 cups onions , chopped fine
1 red bell pepper, chopped
4 medium cloves garlic, minced (about 2 tablespoons)
4 tablespoons (1/4 cup) chili powder
1 teaspoon ground cumin
1 teaspoon ground coriander
2 teaspoons ground cinnamon
1 teaspoon dried oregano
1/4-1/2 teaspoon cayenne pepper
2 teaspoons brown sugar
2 pounds 85 percent lean ground beef
2 (15-ounce) cans red kidney beans , drained and rinsed
1 (28-ounce) can diced tomatoes , with juice (my fave is Tuttorosso)
1 can (28 ounces) tomato puree (Tuttorosso)
1 can (15 oz.) or 2 cups 100% Pure Pumpkin
about 2 tablespoons kosher salt

Instructions:
1. Heat oil in large heavy-bottomed Dutch oven over medium heat until shimmering 3 to 4 minutes. Add onions, red pepper, garlic, chili powder, cumin, coriander, cinnamon, oregano, brown sugar and cayenne; cook, stirring occasionally, until vegetables are softened and beginning to brown, about 10 minutes. Increase heat to medium-high and add half the beef and cook, breaking up pieces with wooden spoon, until no longer pink and just beginning to brown, 3 to 4 minutes. Add remaining beef and cook, breaking up pieces with wooden spoon, until no longer pink, 3 to 4 minutes.

2. Add beans, tomatoes, tomato puree, pumpkin, and 1 teaspoon salt; bring to boil, then reduce heat to low and simmer, covered, stirring occasionally, for 1 hour. Remove cover and continue to simmer 1 hour longer, stirring occasionally until beef is tender and chili is dark, rich, and slightly thickened. Adjust seasonings/salt to personal taste if needed.

3. Slow Cooker Option: At the end of step 1, transfer the cooked beef mixture to a slow cooker; add the rest of the ingredients as directed in step 2. Cook the chili on the high setting for four hours.

Friday, October 31, 2008

Pumpkin-Swirl Brownies

Chocolate and pumpkin is probably my favorite combo ever. It's the best!


I thought these brownies were just ok, but everyone else loved them. I thought something wasn't quite right with the texture so I need to try them again soon. I'm tempted to try this cheesecake version instead.

Saturday, October 25, 2008

Salt Cellars


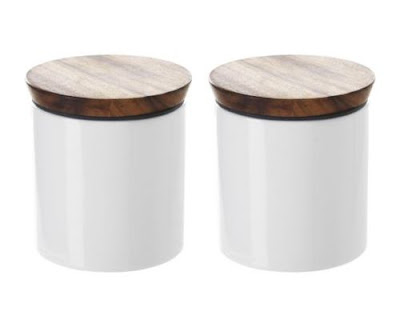
Isn't this little apple jar with spoon so adorable? Unfortunately it's no longer available. I have been looking for a little white salt jar with a wooden spoon and this one seemed so perfect. I first saw it on Apartment Therapy a while back. It was designed exclusively for the MoMA (Museum of Modern Art) online store by a Japanese artist named Tatsuya Okazaki. If you have never heard of MoMA before you must check out their site, tons of amazing pieces!


I love this little salt pig too, but I think I prefer something with a lid.


I decided on these cute white spice jars from IKEA because I really loved the wood lids. Now I want this little spoon to match from Live Wire Farms. They have the best hand sculpted spoons from Vermont timber. It's exactly what I've been looking for!

Apple Crisp


I rarely ever use my Betty Crocker cookbook except when it comes to classics like good old fashioned apple crisp. This has become my "go to" recipe that I use all the time. It's just so simple and delicious.

Sunday, October 19, 2008

Butternut Squash Baked Macaroni and Cheese


Well Fall is officially here and I'm so excited! Fall is my all time favorite season and it's when I go crazy stocking up on pumpkin spice coffee, canned pumpkin, and an absurd amount of baking supplies. I have so many pumpkin recipes I can not wait to try so look out in the months ahead.


Up until today, I have never cooked or baked anything using butternut squash. I don't know why, they are so amazingly good.

These squash are also called butternut pumpkins and actually have the same sweet, nutty taste as regular pumpkins. They are both part of the squash family so there are a lot of similarities and can be used interchangeably. And did you know that squash are considered a power food because they are high in fiber, vitamin A, and especially beta carotene?
So in case you haven't tried it before, you must! Anyway, on with the recipe...


I have been craving something really special and creamy using the squash and the fresh ricotta I picked up at Trader Joe's last week. It came down to either lasagna or risotto. But then somehow I found this mac-and-cheese recipe and it won!

I cut the recipe in half and we still had a ton left over. Also, I only used the butternut squash, no acorn. Oh and if you can't find amaretto cookies you can use Italian almond cookies or biscotti-that's what I used.

Friday, October 10, 2008

Ooh La Le Creuset!

I am officially the proud owner of a beautiful White 7 1/4 Quart Le Creuset Dutch Oven!


Ever since watching the Food Network I have dreamed about one day owning my very own cast iron French dutch oven. The original retail price for one of these particular pieces is $260 and being the bargain hunter that I am would never ever pay that price for a piece of cookware.

The white dutch oven is always pictured in my Everyday Food magazines and on my fave Everyday Italian. I just love it. I also adore the red. I'm not sure why but Le Creuset discontinued white so it is nearly impossible to find except if you get lucky and score one on ebay. That is how I got mine! A few weeks ago I randomly came across a seller who was selling a bunch of used white pieces that were in pretty good shape. The pictures and description for the 7 1/4 oven showed a bunch of light scratches on the inside, but other than that it was as good as new. So I waited for 5 days until the auction was about to end and in the last 20 seconds I bid and won it for $64! Just wait, it gets better....

Five days later my prize arrived in the mail. It was a little dirty, but looked way better in person. I used my trusty Magic Eraser on the inside just to see if the scratches would rub off. And they did! So they weren't scratches after all and now my Le Creuset is perfect!


I know most people don't get this excited about cookware, but nothing can compare to the versatility of these dutch ovens. You can use them stove-top, in the oven and then store the leftovers right in the refrigerator. The high quality enamel lining is gorgeous and is actually very easy to clean. And if you are low in iron like me, the pot actually releases iron into your food. The best part is that there's a lifetime guarantee so if anything happens the company will replace it with a brand new one for free!

Now if only I could score one of these red buffet casseroles.

Sunday, September 21, 2008

Farmers Market Blueberry Cupcakes


A few months ago I heard about Trophy Cupcakes while watching "Cupcake Week" on the Martha show. Since then I've become obsessed with cupcakes and got really excited when I saw this recipe featured on their site.

These cupcakes took me about 3 hours to make, but were a lot of fun. They should not take 3 hours, but since I STILL do not have a Kitchenaid stand mixer, it took me a little longer plus I messed up. For the meringue you have to beat the egg whites for about 10 minutes or so and I had to do that twice (by hand-mixer) because I ruined the first batch. Whenever you need to beat egg whites for airy meringues or souffles do not allow a speck of egg yolk into the bowl or they will not fluff up at all. I was whipping and whipping away for like 20 minutes until I decided to "Google" my problem and found out what was wrong. So lesson learned.


Here are my thoughts about the overall outcome. I thought the meringue was really really buttery. I should have know better since Swiss Meringue is supposed to be buttery. The recipe called for a whole pound of butter for the frosting alone. Yep, that's right... 4 whole sticks of butter! It does make a lot though and I have to say the consistency was dreamy. It was the perfect piping frosting. The cake part was a tad dry and almost tasted more like a muffin.

I still really liked these cupcakes, but will try to tweak a few things next time and will try a different meringue recipe.

Wednesday, September 17, 2008

Steak Salad

I'm a really big fan of salads, especially when they can serve as a meal all in itself.


Since my recent discovery of the flat iron steak, I really wanted to try this recipe. Flat iron steak is best when marinated so I just use a little bit of olive oil and really good steak seasoning. Let it sit room temperature for about 30 minutes, grill it, then slice into strips. Goes great with grilled asparagus, our favorite.

Tuesday, September 2, 2008

S'more Tart


I made this tart a few weeks ago for a family picnic. You really can't go wrong when it comes to s'mores or marshmallow..anything. I don't know anyone who doesn't love them.


I used Callebaut (it's the best) semi-sweet chocolate for the filling, but I will probably use bittersweet next time. It was very sweet.

This was a lot of fun to make, but a nifty little kitchen torch would of come in handy to toast the marshmallow topping. I think I left it in the oven too long because the topping started to melt a little bit.


S'more Tart
adapted from a lot of sources

For the crust:
1-1/4 cups Graham Cracker Crumbs
1/4 cup sugar
5 tbsp. butter, melted

Preheat oven to 375°F. Mix all ingredients until well blended.
Bake 8 min. or until lightly browned; cool completely.

For the filling:
7 oz fine-quality bittersweet chocolate or semi-sweet, chopped finely
1 cup heavy cream, (I used half-n-half because that's all I had)
1 large egg, at room temperature for 30 minutes
pinch of salt

Put chocolate in a large bowl. Bring cream just to a boil in a 1- to 1 1/2-quart heavy saucepan, then pour hot cream over chocolate. Let stand 1 minute, then gently whisk until chocolate is melted and mixture is smooth. Gently whisk in egg and a pinch of salt until combined and pour into graham cracker crumb crust (crust will be about half full). Bake until filling is softly set and trembles slightly in center when gently shaken, about 25-30 minutes. Cool pie to room temperature on a rack (filling will firm as it cools), about 1 hour. (I chilled in the refrigerator to speed up the process.)

For the topping:

1 7-ounce jar Marshmallow Creme
3 large egg whites
1/8 teaspoon salt
1/4 cup sugar

Scrape the jar of marshmallow creme into a big bowl and set aside.

Beat the egg whites with salt in another large bowl until foamy. Add sugar, 1 tablespoon at a time and beat until stiff and glossy peaks form. This can take 7-10 minutes.
Add 1/2 cup of the beaten egg whites to marshmallow creme and stir with rubber spatula until just incorporated. Fold in remaining whites in 2 additions until just incorporated. Spread or pipe meringue over top of cold pie. Swirl with a knife to create peaks or use the pastry bag to do the same. ( I used a big star tip to pipe the top).

Bake pie just until peaks and ridges of marshmallow meringue are lightly browned, about 4 minutes. Don't walk away from the oven! Or if you have a kitchen torch, use that to lightly brown the peaks. Let stand at room temperature until meringue is cool. Enjoy!

Monday, August 25, 2008

White Chocolate Raspberry Cupcakes


I love cupcakes and have been wanting so badly to use my new cupcake book. Awhile back I wanted to make white chocolate raspberry cupcakes for Justin (per his request) but couldn't find a solid recipe of exactly what I was looking for. So I took 2 separate recipes from the book, added some white chocolate chips and this was the outcome.

Justin told me these were the best cupcakes I ever made and I must say were pretty darn good. Quite an indulgence though!

Cupcakes
adapted from cupcakes by Elinor Klivans

1 1/4 cups unbleached all-purpose flour
1/2 tsp. baking powder
1/4 tsp. baking soda
1/4 tsp. salt
1 large egg
1 large egg yolk
1 cup sugar
1/2 cup canola oil
1 tsp. vanilla extract
1/2 cup sour cream
1 cup good quality white chocolate chips (I like Guittard)

Preheat the oven to 350 degrees. Line 12 muffin tin cups with cupcake liners. Sift the flour, baking power, baking soda, and salt in a medium bowl and set aside.

In a large bowl, using a electric mixer on medium speed, beat the egg and yolk and sugar until thickened and lightened to a cream color, about 2 minutes.

Stop the mixer and scrape the sides of the bowl as needed during mixing. On low speed, mix in the oil and vanilla until blended. Mix in the sour cream until no white streaks remain. Mix in the flour mixture until it is incorporated and the batter is smooth. Mix in a cup of white chocolate chips.

Fill each cup with about 1/3 cup of batter, to about 1/4 inch below the top of the liner. Bake until the tops feel firm and a toothpick comes out clean, about 25 minutes. Cool completely before frosting.

Frosting:
adapted from cupcakes by Elinor Klivans

1 cup fresh raspberries or defrosted unsweetened raspberries
6 tablespoons (3/4 stick) unsalted butter, room temp.
4 ounces cream cheese, at room temp.
1/2 tsp. almond extract
2 1/2 cups powdered sugar

Process the raspberries in a food processor. Strain the puree through a fine strainer into a small bowl; discard any seeds and pulp left in the strainer. You will have about 1/3 cup of puree. Set aside.

In a large bowl, using an electric mixer on low speed, beat the butter, cream cheese, and almond extract until smooth and thoroughly blended. Gradually add the powdered sugar, mixing until smooth, about 1 minute. Mix in the raspberry puree, then beat on medium speed for 1 minute to lighten the frosting. Use a small spatula to spread about 2 1/2 tablespoons of frosting thickly over the top or pipe onto each cupcake. Top with a berry.

Fennel and Orange Salad


Here is another one of my favorite salads. It's really, REALLY good and by far my favorite!

This is a Sicilian salad (no wonder I love it so much) that is best when oranges are in season. I used seedless Valencia oranges, but you can use any that are seedless or blood oranges.

There is such a lovely sweet and savory combo going on that is out of this world. All of the flavors surprisingly blend so well together and the licorice-y fennel adds so much freshness.

Friday, August 15, 2008

Sweet Cherry Pie

Summer is almost over and it would not be complete without a sweet cherry pie. I meant to post this last month when cherries were at their peak, but have been caught up with.. well, you know, summer things.

While I've never really been a fan of cherry pie, it is my husband's favorite. Most cherry pies that I've had were either too tart or sour and in my opinion, the sweeter the better. I was graciously given a HUGE bag of juicy and sweet bing cherries so there was no excuse not to make cherry pie when they are free and this gorgeous.


Thank God for that handy little pitter. I still had cherry juice all over myself. What a mess!


I used this recipe from my Everyday Food magazine. The only thing I changed was add a 1/4 tsp. of almond extract.

The pie was definitely different than the cherry pies that use the canned filling. It seemed almost more like a cherry cobbler. It was still delicious, but the filling wasn't quite thick enough. I will try a different recipe next time or maybe it was just something I did wrong. If anyone has knowledge on the topic or wanna share a great recipe, I'm all ears.

Sunday, August 10, 2008

Pasta with Creamy Tomato Sauce


This recipe comes from Cooks Illustrated magazine. Their recipes are always thorough and a fail- safe for me.

You will need tomato paste and I highly recommend using Amore. It comes in a tube versus the typical 6 oz. cans you see in grocery stores. This is a must have in my kitchen because I don't know how many times I've had to toss almost a full can that has gone bad. I usually only need a tablespoon here and there so I love using it. It's also imported from Italy.

With the combination of tomatoes and cream this dish is perfection!

Pasta with Creamy Tomato Sauce
Cooks Illustrated

This sauce is best served with short pasta, such as ziti, penne, or fusilli.

INGREDIENTS
3 tablespoons unsalted butter
1 ounce prosciutto , minced (about 2 tablespoons)
1 small onion , diced fine (about 3/4 cup)
1 bay leaf
Pinch red pepper flakes
Table salt
3 medium garlic cloves , minced or pressed through garlic press (about 1 tablespoon)
2 tablespoons tomato paste
2 ounces oil-packed sun-dried tomatoes , drained, rinsed, patted dry, and chopped coarse (about 3 tablespoons)
1/4 cup plus 2 tablespoons dry white wine
2 cup plus 2 tablespoons crushed tomatoes (from one 28-ounce can)
1 pound pasta (see note)
1/2 cup heavy cream
Ground black pepper
1/4 cup chopped fresh basil leaves
Grated Parmesan cheese , for serving

1. Melt butter in medium saucepan over medium heat. Add prosciutto, onion, bay leaf, pepper flakes, and 1/4 teaspoon salt; cook, stirring occasionally, until onion is very soft and beginning to turn light gold, 8 to 12 minutes. Increase heat to medium-high, add garlic, and cook until fragrant, about 30 seconds. Stir in tomato paste and sun-dried tomatoes and cook, stirring constantly, until slightly darkened, 1 to 2 minutes. Add 1/4 cup wine and cook, stirring frequently, until liquid has evaporated, 1 to 2 minutes.
2. Add 2 cups crushed tomatoes and bring to simmer. Reduce heat to low, partially cover, and cook, stirring occasionally, until sauce is thickened (spoon should leave trail when dragged through sauce), 25 to 30 minutes.
3. Meanwhile, bring 4 quarts water to boil. Add pasta and 1 tablespoon salt and cook until al dente. Reserve 1/2 cup cooking water; drain pasta and transfer back to cooking pot.
4. Remove bay leaf from sauce and discard. Stir cream, remaining 2 tablespoons crushed tomatoes, and remaining 2 tablespoons wine into sauce; season to taste with salt and pepper. Add sauce to cooked pasta, adjusting consistency with up to 1/2 cup pasta cooking water. Stir in basil and serve immediately, passing Parmesan separately.

Thursday, August 7, 2008

Blueberry Crumb Cake


In my Fourth of July post I mentioned this blueberry cake. It is a very simple and old fashioned recipe.

My dad and Justin absolutely love crumb coffee cake so I will be making this one a lot.

Thursday, July 31, 2008

Watermelon and Feta Salad


This is my new favorite salad. It is so refreshing and light, making the perfect summer meal.

I added some mint leaves for an added fresh kick. You gotta try this, it really is good!

Saturday, July 19, 2008

Spinach Lasagna with Prosciutto


I've always loved lasagna. I'll take it any way I can as long as there's lots of cheese!

I made this spinach lasagna a few weeks ago, but forgot to post it. It's a great alternative to the traditional meaty lasagna. It was sooo good.

Spinach Lasagna with Prosciutto
adapted from Cooks Illustrated

INGREDIENTS

Spinach
1 tablespoon table salt
20 ounces curly spinach (2 bags), stemmed and rinsed OR frozen spinach drained

Bechamel
5 tablespoons unsalted butter , divided
2 ounces thinly sliced prosciutto , chopped medium
5 large shallots , minced (about 1 cup)
4 medium cloves garlic , minced or pressed through garlic press (generous 1 tablespoon)
1/4 cup unbleached all-purpose flour
3 1/2 cups whole milk
2 bay leaves
3/4 teaspoon fresh grated nutmeg
1/2 teaspoon table salt
1/4 teaspoon ground black pepper
1 ounce grated Parmesan cheese (about 1/2 cup)

Cheeses and Pasta
8 ounces whole milk cottage cheese OR ricotta cheese
1 large egg
1/4 teaspoon table salt
1 tablespoon unsalted butter for baking dish
12 no-boil lasagna noodles from 1 box
1 ounces grated Parmesan cheese (about 1/2 cup)
8 ounces Italian fontina cheese , shredded (about 2 cups)
8 ounces fresh mozzarella

1. For the spinach: Fill large bowl with ice water. Bring 4 quarts water to boil in large Dutch oven or stockpot over high heat; add salt and spinach, stirring until spinach is just wilted, about 5 seconds. Using skimmer or fine-mesh strainer, transfer spinach to ice water and let stand until completely cool, about 1 minute, then drain spinach and transfer to clean kitchen towel.
Wrap towel tightly around spinach to form ball and wring until dry. Chop spinach medium and set aside.

2. For the béchamel: Melt 2 tablespoons of the butter in a medium saucepan over medium heat until foaming, add the prosciutto. Sauté until slightly crisp, about 4 minutes. With a slotted spoon, remove the prosciutto to a small bowl.
Melt the remaining 3 tablespoons butter in the saucepan over medium heat until foaming; add shallots and garlic and cook, stirring frequently, until translucent, about 4 minutes. Add flour and cook, stirring constantly, for about 1 1/2 minutes; do not brown. Gradually whisk in milk. Bring mixture to boil over medium-high heat, whisk in bay leaves, nutmeg, salt, and pepper; reduce heat to low and simmer 10 minutes, whisking occasionally. Whisk in Parmesan and discard bay leaves. Transfer sauce to bowl, press plastic wrap directly against surface, and set aside.

3. For the cheeses, pasta, and assembly: Blend cottage cheese, egg, and salt in food processor or blender until very smooth, about 30 seconds. Transfer to bowl and set aside.
Adjust oven rack to middle position and heat oven to 425 degrees. Place noodles in a 13- by 9-inch broilersafe baking dish and cover with hot tap water; let soak 5 minutes, agitating noodles occasionally to prevent sticking. Remove noodles from water and place in single layer on kitchen towel. Wipe baking dish dry and coat with remaining 1 tablespoon butter. Use rubber spatula to distribute 1/2 cup béchamel in bottom of baking dish; position 3 noodles on top of sauce.
Stir spinach into remaining béchamel in bowl, mixing well to break up clumps of spinach (you should have about 4 cups spinach/béchamel mixture).
Spread 1 cup spinach mixture evenly over noodles, sprinkle evenly with Parmesan, and top with 3 more noodles. Spread 1 cup spinach mixture evenly over noodles, sprinkle evenly with 1 cup fontina and half of the mozzarella, and top with 3 more noodles.
Spread 1 cup spinach mixture evenly over noodles, followed by cottage cheese mixture. Sprinkle the prosciutto evenly over the cottage cheese mixture. Finish with 3 noodles, remaining cup spinach mixture, remaining cup fontina and rest of the mozzarella.
Lightly spray large sheet foil with nonstick cooking spray and cover lasagna. Bake until bubbling, about 20 minutes, then remove foil. Remove lasagna and adjust oven rack to uppermost position (about 6 inches from heating element) and heat broiler.
Broil lasagna until cheese is spotty brown, 4 to 6 minutes. Cool 10 minutes, then cut into pieces and serve.

Wednesday, July 9, 2008

Birthday Goodies


My lovely husband got me this amazing Kitchenaid food processor for my birthday yesterday which was a total surprise. I can't wait to get busy and make pies, pesto, and anything else you can whip up really fast!

He also got me these two great books that I've been wanting:


Saturday, July 5, 2008

Fourth of July Blueberry Pie


I love blueberries so much that just about every day this week I came home with a few quarts. There were 8 quarts total to be exact. I also made a blueberry crumb cake that I'll post later on. It was very yummy!


You can get fancy if you'd like and cut out festive little stars. I don't think I used the correct star cut out because the tips were a little more pointed than shown in the picture in my Martha book. You can also see a photo here which was inspired by Martha. My stars sunk a little bit!


The recipe can be found here; although, it is not the Fourth of July version.